


Flash ESP32 firmware on Windows
This tutorial walks through installing the EMWaver Windows app and flashing the managed ESP32 firmware onto a supported dev board (ESP32, ESP32-S2, or ESP32-S3) — no ESP-IDF or manual build loop required.
- A Windows 11 PC
- An ESP32-family dev board (ESP32, ESP32-S2, or ESP32-S3)
- A USB-C cable that supports data
- The EMWaver Windows app
1. Download and install
Download the latest EMWaver Windows installer or portable package from GitHub Releases:
Run the installer. It places the app under the Start menu and creates a desktop shortcut. The portable .zip package is also available on the install page if you prefer it.
2. Open the Device Connection window
Launch EMWaver, then click the Device button in the top-left corner. This opens the Device Connection window. Scroll down to the firmware section; this is where the Flash firmware button appears.
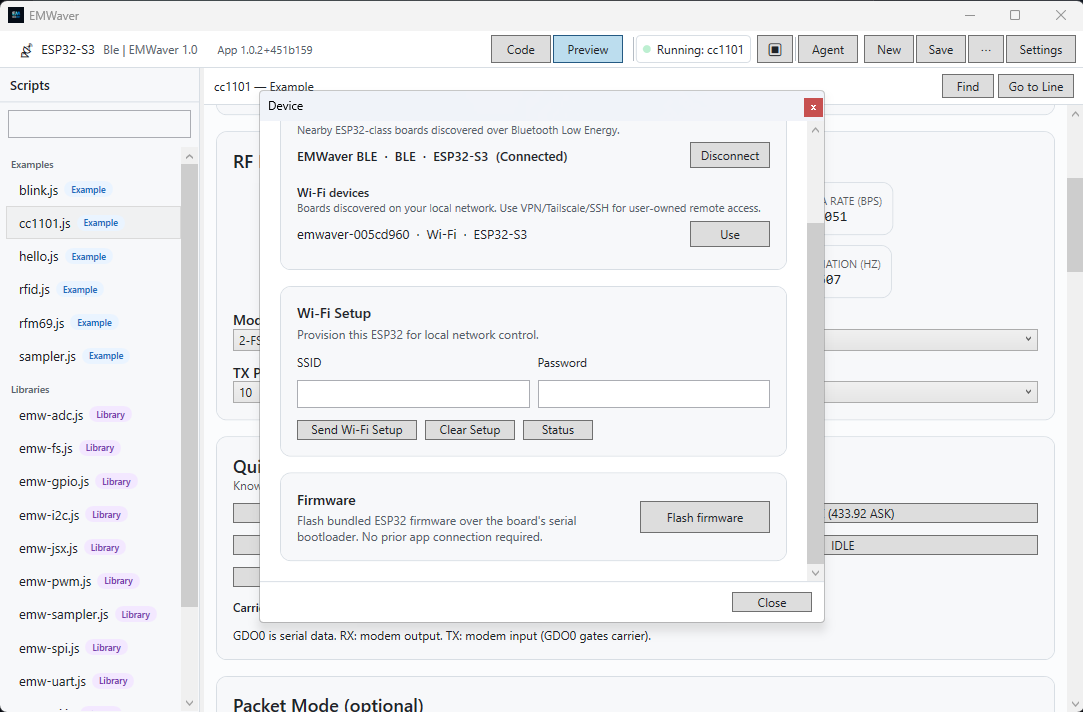
3. Put the ESP32 into bootloader mode
Before flashing, the ESP32 must be in bootloader mode. On a typical ESP32-family dev board:
- Hold BOOT.
- Press and release RST / RESET.
- Release BOOT after a second.
When bootloader mode is detected, the Device Connection window shows a bootloader status near the top-left. If it does not appear, press Refresh in the flashing section after putting the board into bootloader mode.
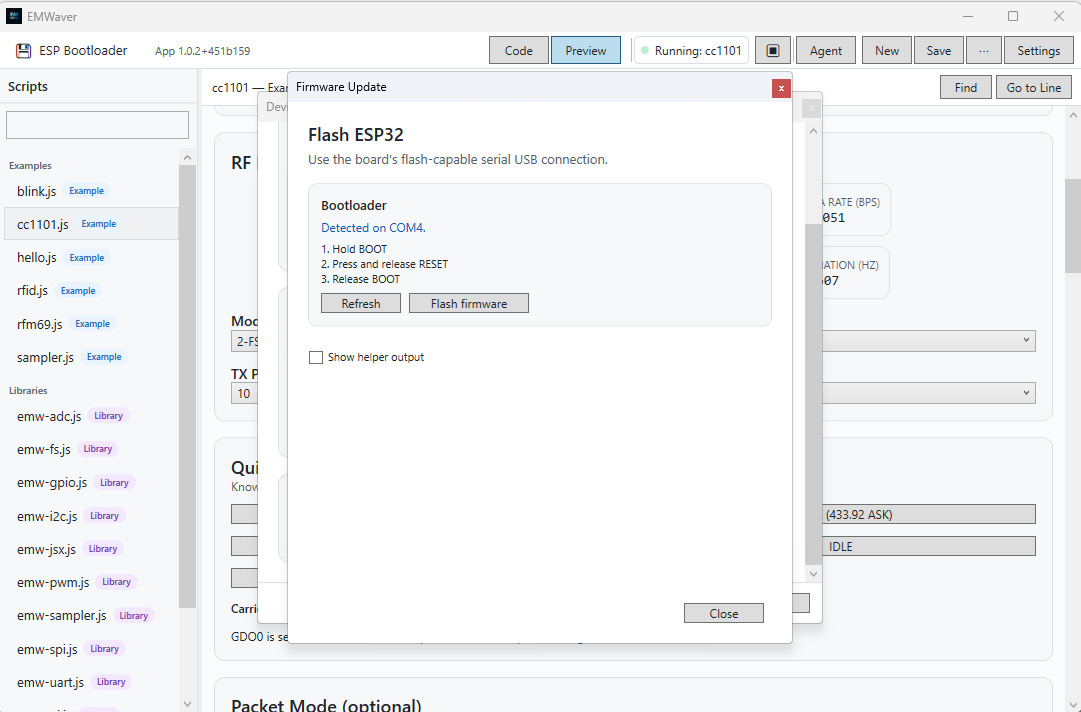
4. Flash firmware
Click Flash firmware. The app uses the bundled ESP32 flashing helper and the prebuilt EMWaver ESP32 firmware images that ship inside the app.
The flashing process can take around 2 minutes. Keep the board plugged in and do not close the app while the progress log is running.
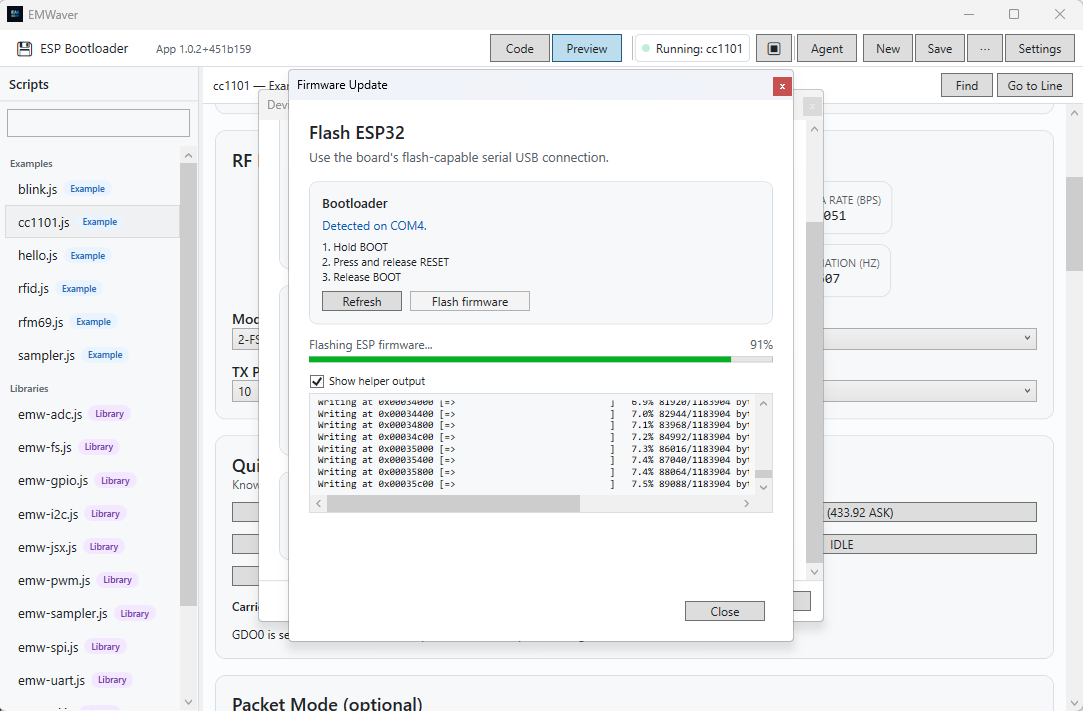
The Windows app bundles the ESP32 firmware partitions:bootloader.bin,partition-table.bin,ota-data.bin, andapp.bin. You do not need to download or build anything else.
5. Reset and verify
When flashing completes, reset the ESP32 board. Do this by pressing RST / RESET, or by unplugging and plugging the board back in without holding BOOT.
The device should now leave bootloader mode and show up in EMWaver as a connected device. Verify that the top-left device indicator looks connected, like it did before flashing.
Run a test script
Switch to the Scripts view, open one of the built-in scripts, and press Run:
hello.js— confirms the script engine is working.blink.js— toggles a GPIO pin.cc1101.js— controls a CC1101 module over SPI.
Troubleshooting
Bootloader not detected
Hold BOOT, press and release RST, then release BOOT after a second. If it still does not appear, click Refresh in the flashing section or try another data-capable USB cable.
Wrong COM port selected
Use the port selector in the firmware flashing window. Pick the port that appears when the ESP32 is plugged in or enters bootloader mode.
Device does not reconnect after flashing
Reset or replug the board without holding BOOT. If it stays in bootloader mode, press RST again with BOOT released.
Next steps
With firmware flashed and a working connection:
- Try Windows CC1101 (433 MHz) to wire up a radio module and transmit a 433 MHz carrier.
- Read the scripting guide to learn the JSX UI model and device API modules.